


Module Style Icemaker
The page below has several test points and great useful information. Many refrigerator makes today use this "module" style icemaker. Whirlpool, some Kenmore's, Sub Zero, Amana and probably a few more that I have forgotten ;-)
Several sections below....
Click image for larger view

Here's a sketch I knocked together showing the internal connections for the motor, fill valve, heater, and thermostat on the modular icemaker. Sketch from YardHaunter, our friendly Engineer.
Test helps....
Ice maker plugged in to the refrigerator.
Shut-off arm down and the freezer is cold ( below 15ºF ).
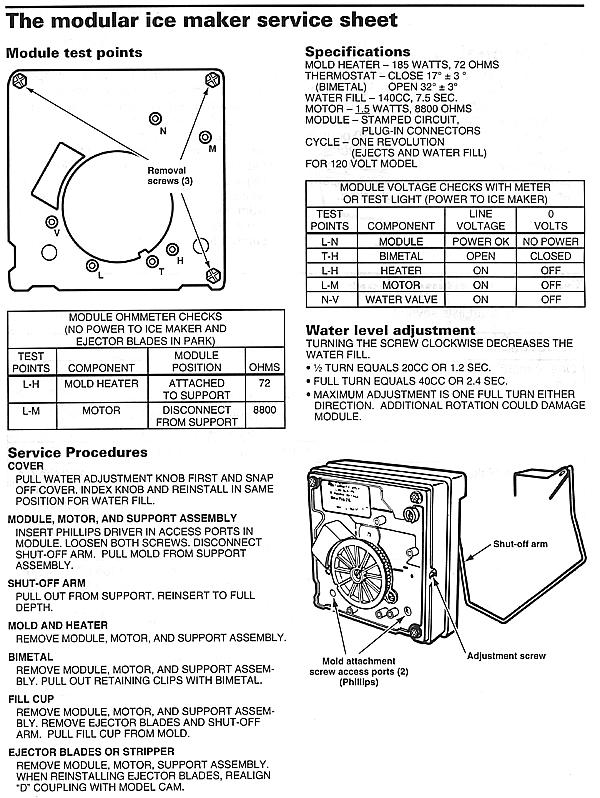
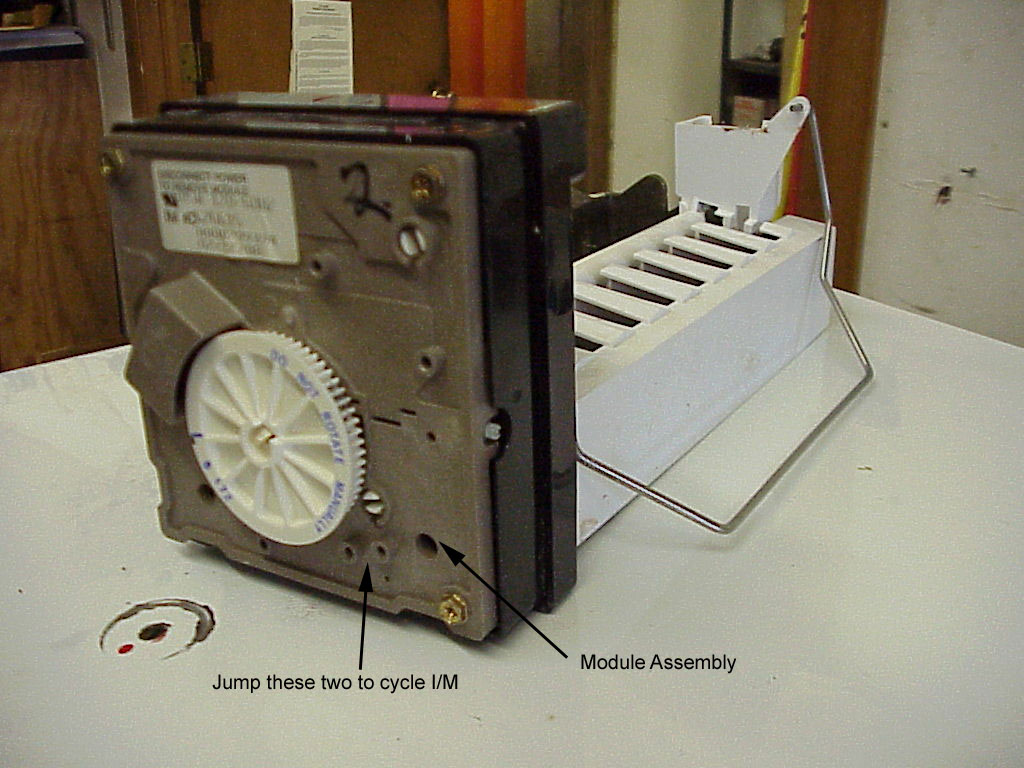
Test points L & N will verify 120 volts to Ice Maker module.
(Make sure your test probes go into the test points 1/2".)
Test points T & H will verify if the bimetal thermostat is open or closed.
Short T & H with an insulated piece of wire ( 14 gauge) with the ends of the wire bare approx 1/2" to run the motor. If the motor doesn't run, replace the module assembly.
If you leave the jumper in for a half of a revolution, you can feel the heater in the mold heat up, if it is good.
Remove the jumper and the water valve will be energized in the last half of the revolution.
A common complaint in the module style ice maker is that the ice container bucket is over flowing with ice cubes, the ice maker seems to be making too many. Once the ice maker is removed from the fridge, the cover is removed and the module is removed ( 3 screws to remove the module - it will then just left straight out ), there are plastic arms that work with the wand arm ( the part that goes up and down with every cycle ) these arms often break, which means a new module to repair this problem. The replacement modules have a "beefier" set of plastic arms that seem to work well. A common complaint in the module style ice maker is that the ice container bucket is over flowing with ice cubes, the ice maker seems to be making too many. Once the ice maker is removed from the fridge, the cover is removed and the module is removed ( 3 screws to remove the module - it will then just left straight out ), there are plastic arms that work with the wand arm ( the part that goes up and down with every cycle ) these arms often break, which means a new module to repair this problem. The replacement modules have a "beefier" set of plastic arms that seem to work well. See picture here.
One common complaint is the icemaker start to operate and then just quits and sits there...often an intermittent complaint is noticed. leave ice maker installed in the fridge, remove the front cover, make sure the ice maker arm is in the on position ( down ) and carefully push on the large center gear...if the ice maker starts to operate or quits when you take your finger off of the large gear, chances are you will need a new module assembly as the printed circuit is worn out. Picture helps to point out the large gear in the center to try this test.
If you see black bits in your ice cubes, the finish probably is coming off the body of the ice maker. You can replace the body as a separate part but often a new ice maker can be close enough in cost. So a whole new ice maker kit should be considered.
Changing a thermostat on the module style icemaker....
- Unplug the the fridge.
- Remove ice maker, remove 3 screws and unplug the power cord.
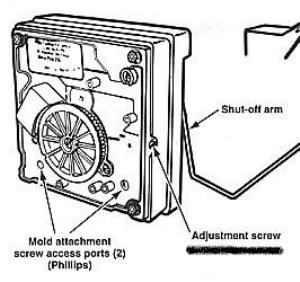
- Remove cover and shut off arm. Loosen the 2 screws holding housing support and module to mold and pull apart.
- With long nose pliers, pull out retaining clips holding the bimetal. See figure 1.
- Install the new bimetal and replace retaining clips. Apply allumilastic to the end of the bimetal that touches the mold body. Picture
- Align ejector with gear on module, at about the 1:30 position. Push the mold and housing support together. Tighten the screws to make good contact with mold.
- Replace shut off arm and cover. Reinstall the ice maker.
- Plug in the fridge.
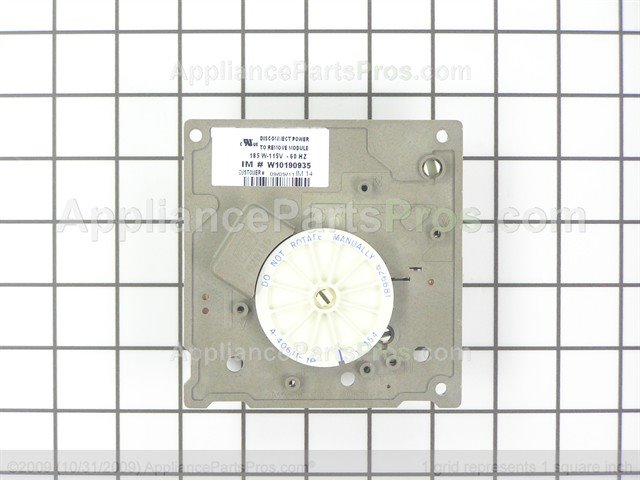
Refrigerator icemaker control module and motor assembly
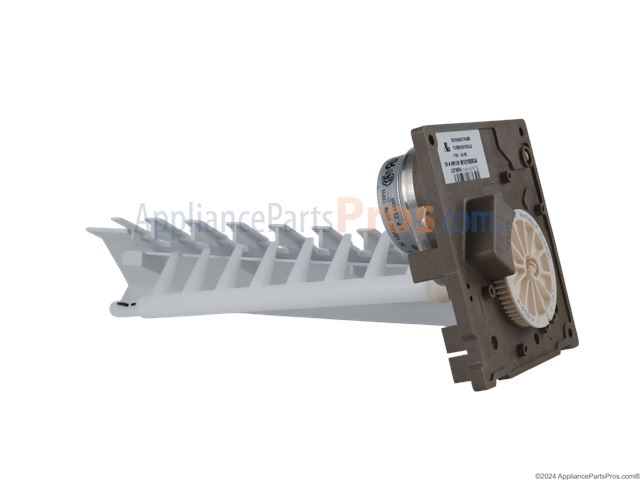
Icemaker control module with ice stripper & ejector arm. For In-Door Ice models that make 8 cubes
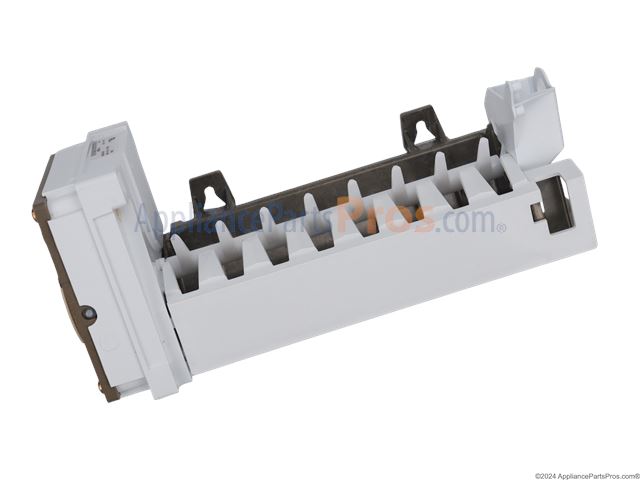
Refrigerator icemaker assembly, modular style
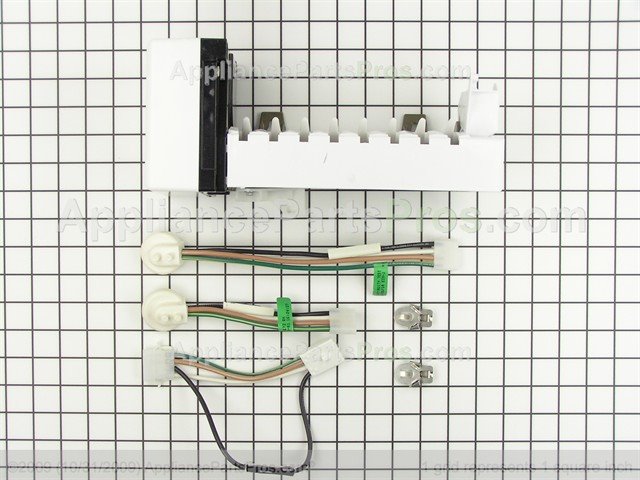
Refrigerator icemaker. This item does not include a new shut off arm. To remove the existing shut off arm from the old icemaker, lift it to the up position, unhook it from the fill cup bearing, and pull it out of the module
![]()
Related Links:

