


Replacing Dryer Heating Element
- Unplug the dryer and pull it far enough away from the wall to remove the vent hose.
- Remove the screws securing the rear access panel, leaving the top center screw for last. Set the panel aside.
- Remove the two wires connected to the limit thermostat on the side of the chimney. You need to write down & remember that the wires go to the thermostat and the spade connectors on the ends of the wires will only fit the thermostat. Remove the two wires at the bottom of the chimney connected to the terminals mounted in ceramic insulators. These terminals are part of the heater element.
- Now go up to the top of the dryer and remove the two screws under the lint filter (pull the filter out first).
- We need to open the top of the dryer now. Slide a putty knife in between the dryer top and the cabinet to release the clips holding the top down. Push in and pry up about 2.5" in from each corner (see the diagram below).
- Grab a stub flat blade screwdriver or a short screwdriver (you aren't going to have much room), raise the top (use your head to prop it up) and remove the sheet metal screw securing the mounting strap on top of the heater chimney (it's way to the back and to your left). Before you remove the strap note how it is looped through the slot on top of the chimney.
- Some newer elements are now 1/2 of the size of the older style versions, picture help and more picture help and even more picture help.
- Go back to the rear of the machine and pull the top of the chimney back and out of the drum bulkhead. Note how the chimney sits on two mounting brackets for later reinstallation. Lift the chimney up and off of its mounting brackets.
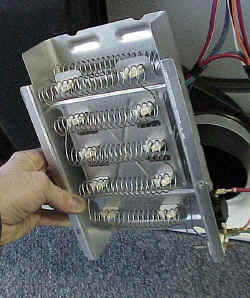
- Lay the chimney down with the vent on the top facing you. Remove the sheet metal screw near the bottom. This releases the heater element. Slide the old element out. Confirm that it has failed by locating the break in the coil.
- Position the chimney above the mounting brackets and carefully lower it into the slots. Push the top of the chimney back into the hole in the drum bulkhead. If the chimney doesn't fit snugly into the hole, check the alignment of the slots at the base of the chimney with those in the mounting brackets.
- Raise the top again and replace the mounting strap and the screw at the top of the chimney. Lower the top and lock the clips by pushing the top down. Replace the two screws that were under the lint filter. Slide the lint filter back in.
- Reconnect the two wires to the limit thermostat and the two wires to the heater element terminals. If the heater element terminals are different from those on the ends of the wires that you disconnected, use the connectors supplied with the new element and splice them onto your wires.
- Replace the rear access panel and its mounting screws. Reconnect the dryer vent hose and plug in the power cord. Check for proper operation.


-
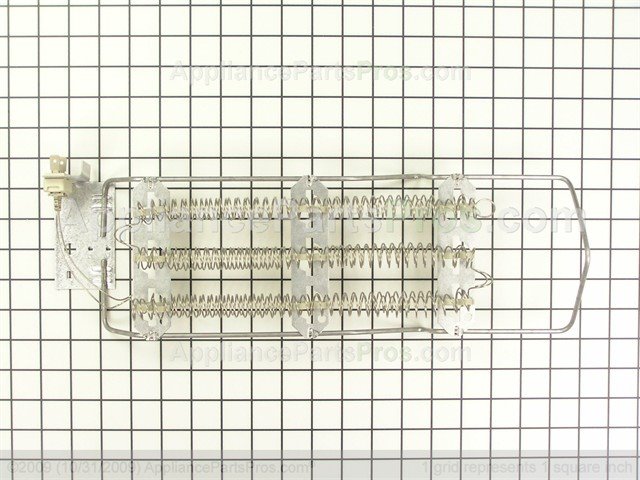
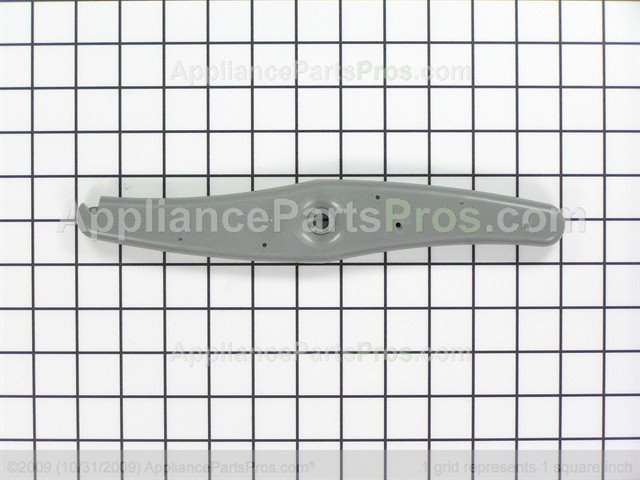
Heating element Long
Item Number 4391960
-
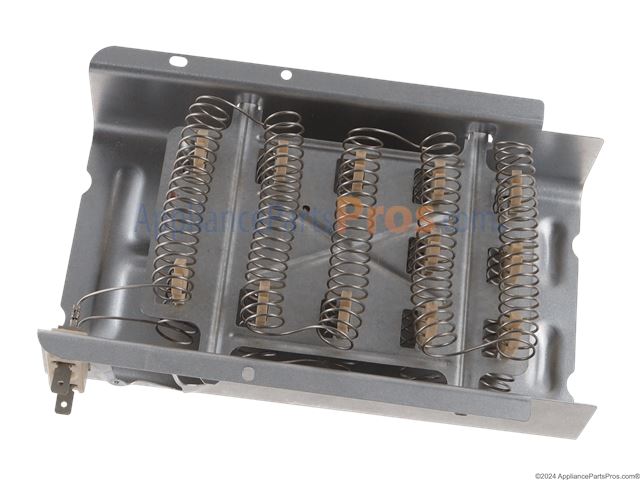
Dryer heating element
Item Number 279838
-
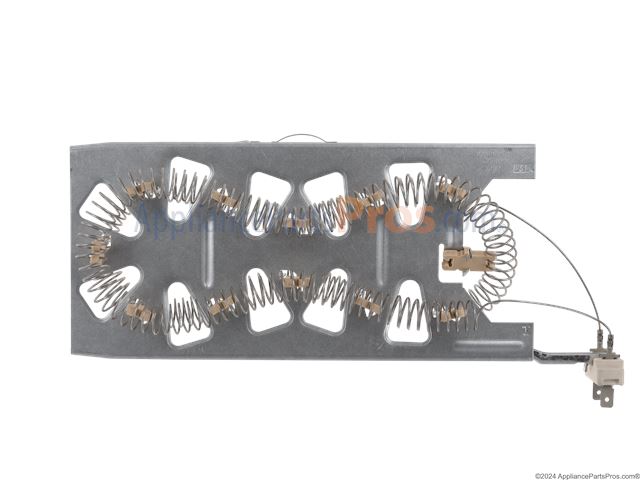
Dryer heating element assembly
Item Number WP3387747
-
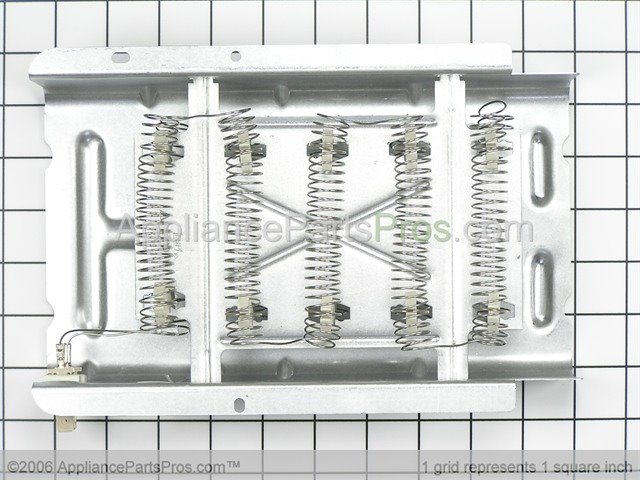
Heating element kit
Item Number WP279843
Whirlpool Washer Dryer Combo Parts
![]()
Related Links


